
When you are hosting your own website, at some point you come to an idea that you need one or more e-mail addresses for your domain, but you do not want to spend additional money for it. So what to use? Well, there is usually two kind of free options available – if you host your website on a shared hosting package, the provider will usually offer some kind of “self hosted” e-mail service, but if you’re using a VPS / VDS or dedicated server, you will have to install and configure it for yourself. But what if you could get a free domain e-mail for your website which would be based on Gmail?
Table of Contents
Stay away from self hosted e-mail solutions and local e-mail service providers!
Hosting an e-mail service is much harder business than hosting a website – also for web hosting companies. To be a successful e-mail service provider, you have to follow a whole bunch of rules and preconditions, gain a certain reputation in the market and have the e-mail service regularly monitored / maintained. Therefore for most of these small providers this usually ends up with: constantly fighting with spam, having an e-mail message deliverability issues to other providers or having a need to monitor and maintain their email server 24/7;
Which of course all plays back to the quality of the service. Luckily you do not need any of this (you do not need to wonder if your e-mail message gets delivered or not, and you certainly do not want to receive a daily portion of “viagra” e-mails in your mailbox) – leave the e-mail business for the big service providers with high trust scores, because they are the best ones in the market who knows how to drive it.
For a high quality e-mail service for your domain you will almost always have to open your wallet, but there is one wise trick which you can use to get it for free.
Cloudflare E-mail routing
Few years ago CloudFlare released a new service called “CloudFlare e-mail routing” for their both – free and paid customers. This service offers you to re-route the e-mails from your domain to other e-mail addresses. So to get e-mails, all you need to do is either to reroute e-mails via this free service to your personal e-mail address or create a separate personal e-mail address and reroute messages to it. There is only a little configuration neccessary with a few clicks on some buttons.
Proceed with DNS configuration changes only if you know what you’re essentially doing. If your domain is using any existing e-mail service you will have to delete its DNS records, which means that it will not be able to send and receive e-mails anymore on behalf of your domain.
To enable CloudFlare E-mail routing for your domain first and the most logical requirement is – you need to have your domain added on CloudFlare – at least for DNS hosting if you do not want to route all traffic through it. While this article will not cover how exactly to do that – once you have it, do the following:
- Ensure that you have a Gmail account in place which you will use to send and receive e-mails from your domain e-mail address (******@gmail.com)
- Log into your CloudFlare account and select the profile of your domain
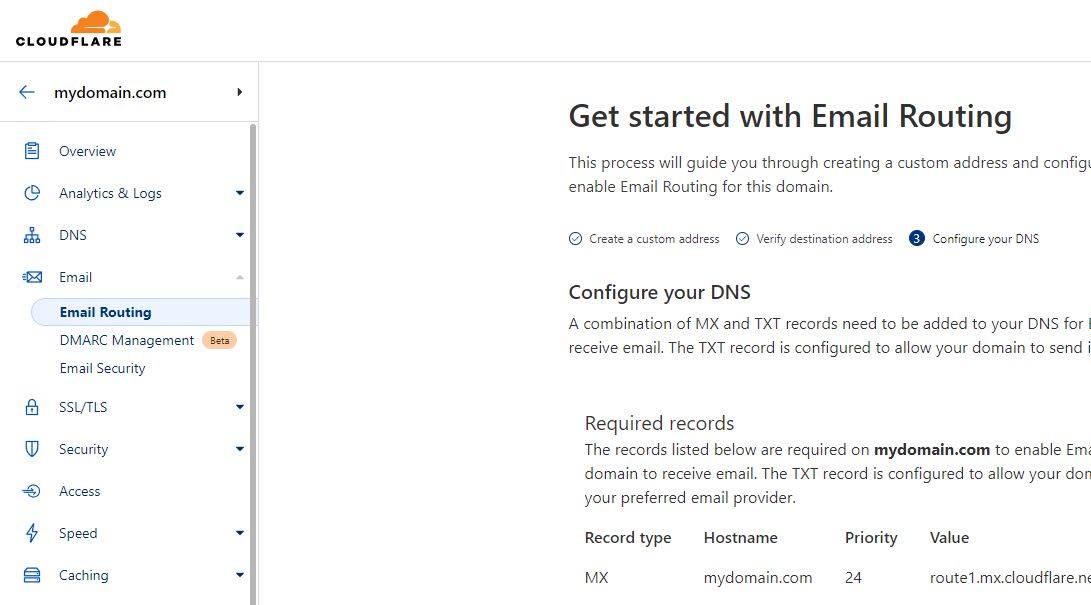
- Click on Email → Email Routing. Then click on “Add records and enable” button. If the button is inactive – review your existing e-mail configuration for the domain and delete the conflicting DNS records (remember that by doing so your existing e-mail service will not be able to send and receive messages for your domain anymore)
- Once you’ve added the proper DNS records, navigate to Email → Email Routing → Routes and under “Custom addresses” add your desired e-mail address to the configuration by clicking on “Create address“
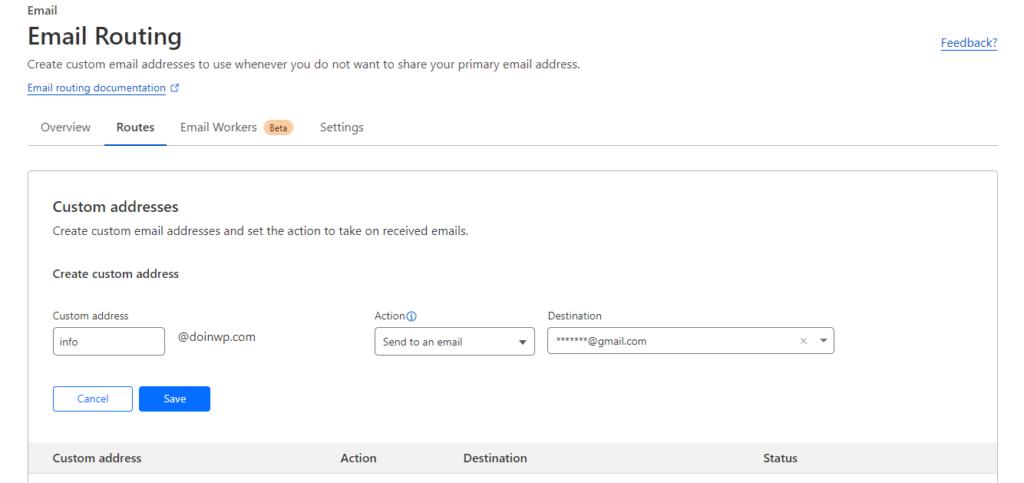
- In the field “Custom address” enter your desired e-mail address for your domain (e.g. info). In the “Action” dropdown field choose the “Send to an email” option. In the “Destination” field – type in or choose your @gmail.com e-mail address which will receive the e-mails coming from your domain mailbox. Then click on “Save” to save the configuration.
- Check your Gmail for a verification e-mail and if you got one, click on the verification link to confirm that you want to receive e-mails from your domain.
- Once you are done – send a test message to the domain e-mail address which you just configured. This is needed just to confirm that you can now receive e-mails from your domain into your Gmail account. When sending a test e-mail, do not use the same e-mail, you’re planning to receive the message to (you’ll not receive it).
Now that you’re successfully configured the e-mail routing service to reroute the incoming e-mails to your desired mailbox, one question remains – how to send e-mails from your domain?
Add the domain e-mail in the Gmail settings and authorize your Gmail account as the sender
Update (23.01.2024): For mission critical e-mail service please do not use this method for OUTGOING e-mails (do not use GOOGLE SMTP server for sending out e-mails with your domain name), since there has recently been a couple of cases when:
1) E-mail sent by this method sometimes landed into recipients SPAM folder;
2) Google took a manual action to forbid sending e-mails with the domain e-mail (e.g. youremail@yourdomain.com), e.g. “You no longer have access to (your e-mail address)“;
3) Google took a manual action and suspended the e-mail account because their “Terms and Conditions” or “Acceptable Usage Policy” have been violated;
For this you will need to:
- Log into your Gmail account
- Ensure that your Gmail account has a 2FA authentication enabled on (if not – enable it)
- Add an app password to your Gmail e-mail address via this link: https://security.google.com/settings/security/apppasswords (enter your domain name as the name of your App Password and then click on “Create“. Note down the password you got for a later use)
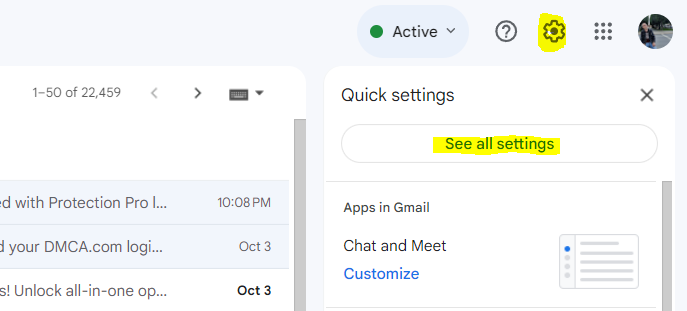
- Go to your Gmail account and open the Gmail settings. You can do it from your Gmail inbox, by clicking on a cog icon near your profile image and then clicking on “See all settings“.
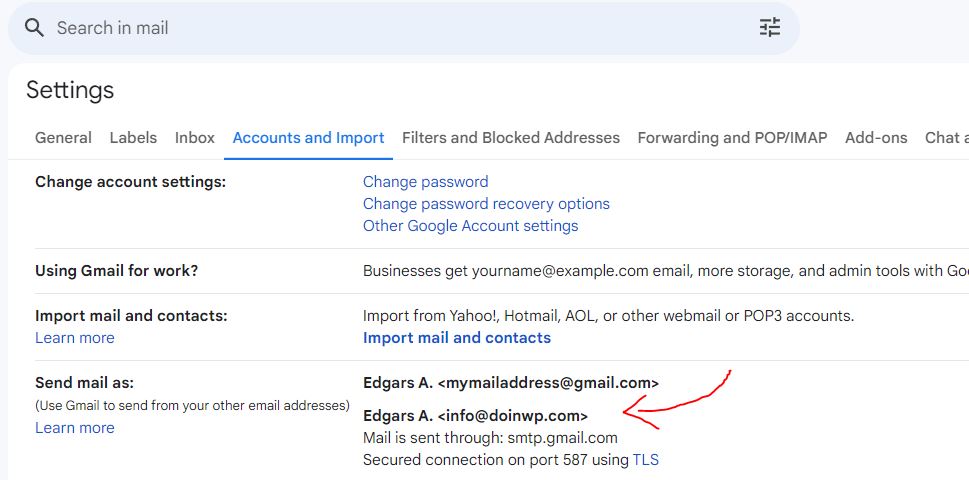
- In your Gmail account settings open “Accounts and Import” tab and then click on “Add another e-mail address” under the “Send mail as:” section.
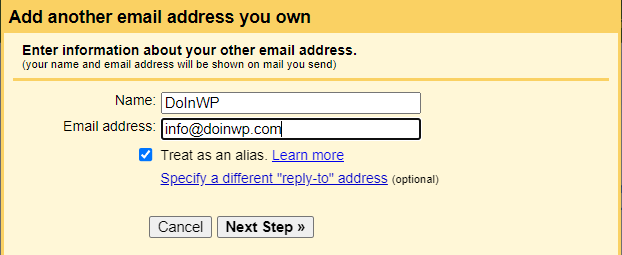
- In the popup window enter your name (with which you will send out e-mails from your domain) and the domain e-mail address. Click on “Next step” to proceed.
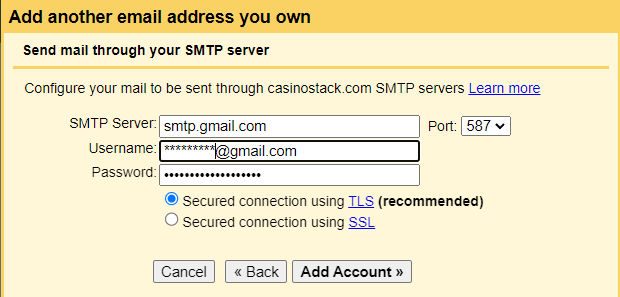
- Now you need to configure your SMTP server settings. We will use Google SMTP, so in the “SMTP Server” field enter “smtp.gmail.com” and choose 587 as a “Port” number. Under “Username“, enter your Gmail account e-mail address and for “Password” – use your Gmail App password you created earlier (Not your account password). Choose “Secured connection using TLS” as the connection option and finally click on “Add Account” button.
- If everything went well, you will receive a verification e-mail (to verify your domain e-mail address as a sender) in your Gmail account shortly. Open it and click on the verification link. Proceed with instructions on screen and once verified, close and reopen your Gmail inbox.
Modify your SPF record to allow sending e-mails from Gmail
When CloudFlare auto-added DNS records for e-mail routing, it did not include Google SMTP servers as a permitted sender in the SPF record, so there’s a few more things to do:
- Go back to CloudFlare, open your domain profile and click on DNS section.
- Edit the TXT/SPF record containing “v=spf1 include:_spf.mx.cloudflare.net ~all” and replace it with this line (to include Google SMTP servers as the allowed sender):
v=spf1 include:_spf.google.com include:_spf.mx.cloudflare.net ~all
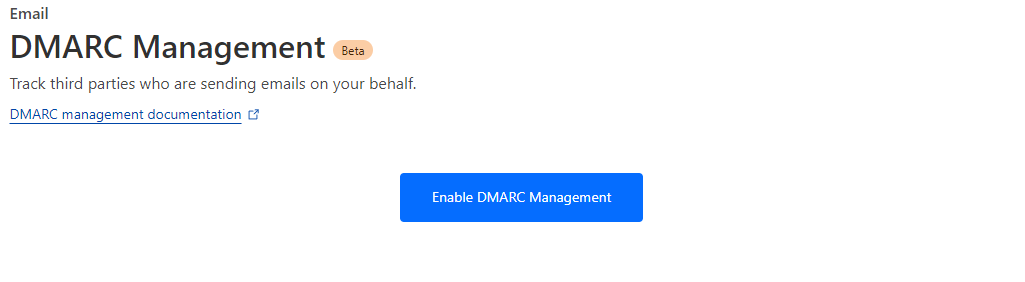
Last step: Check and enable DMARC management
To prevent domain spoofing attacks, check and enable DMARC management. When on CloudFlare, open your domain profile and click on “E-mail” section, then click on “DMARC Management” and look for a button “Enable DMARC Management“. If DMARC is not configured for your domain, you should see it – click on it, and then at the next screen, click “Add”, to add a DMARC record for your domain.
With all steps done, you should be able to send and receive e-mails with your domain e-mail address – all through the Gmail account you configured. Enjoy a free e-mail service for your domain!
Common problems with CloudFlare E-mail routing
There are cases when you can run into some problems when configuring CloudFlare E-mail routing to GMail – Most common of them include:
CloudFlare E-mail Routing status stays at Syncing

Symptoms: When you configure E-mail Routing in CloudFlare and successfully add the destination e-mail address in order to receive incoming messages, you face the problem with “Routing Status” staying in a “Syncing” state for a longer period of time.
Solution: While there is a small chance that something could be wrong with the DNS configuration (domain MX records for example), mostly this problem is related to CloudFlare itself having some technical issues at the particular moment. You should first check if that’s really the case on the CloudFlare Status page. Usually the problem should go away by itself in the matter of minutes. If the “Syncing” status stays for several hours, revert to the previous configuration (if you had one) and try to setup E-mail routing again a bit later.
When sending out e-mails they end up in a recipient’s spam folder
Check if you have added a correct SPF and DMARC records for your domain (examples and instructions above).